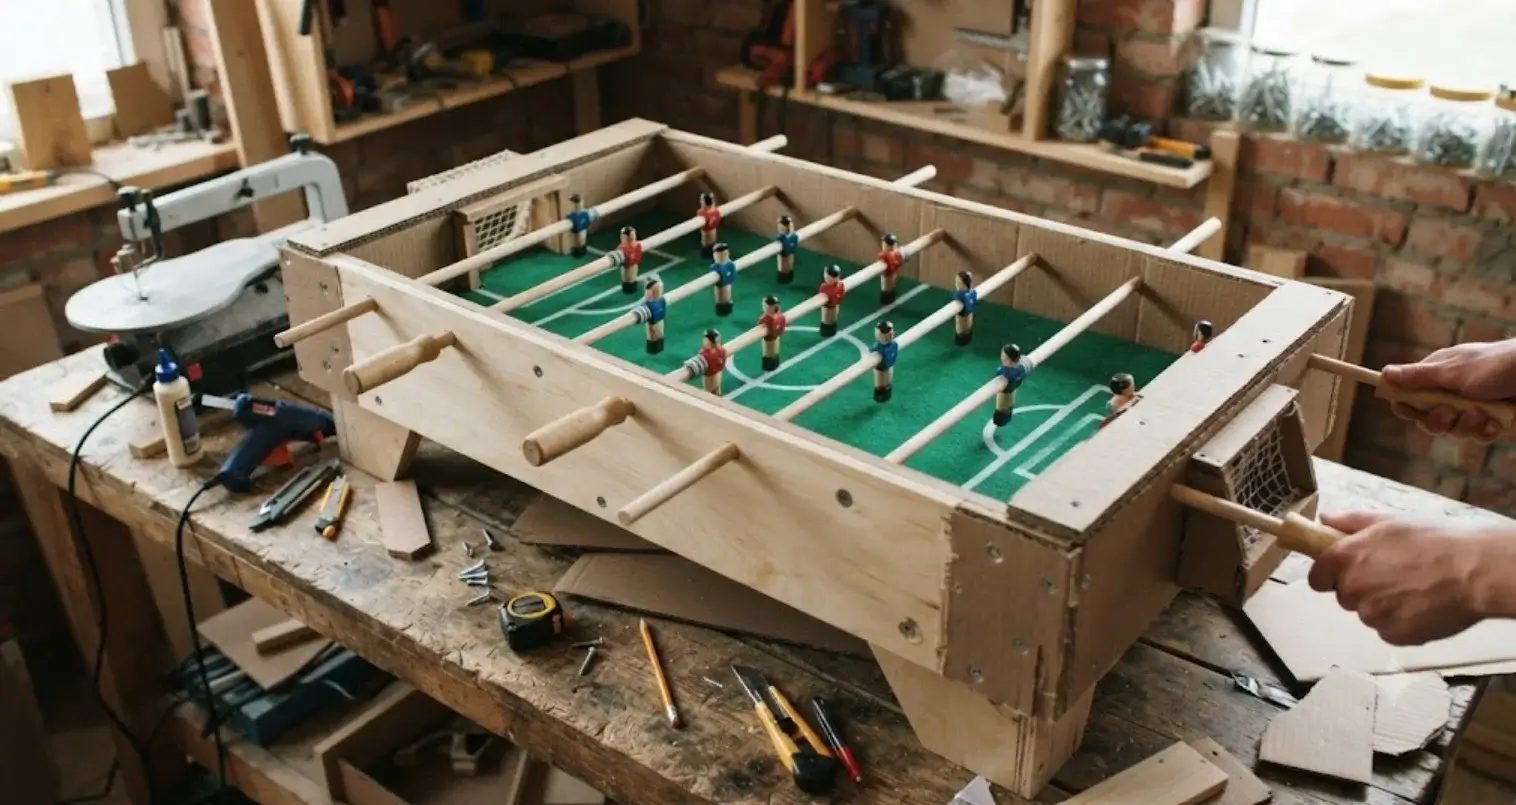
Buying a foosball table is easy. Finding one that fits your space, budget, and “I can probably build that” confidence is the hard part.
A DIY foosball table solves that problem.
You can make a quick cardboard foosball table for kids, a mini tabletop version for casual games, or a wooden DIY foosball table that actually feels playable. This guide shows you how to make a foosball table at home without turning your garage into a factory.
The goal is simple: help you build your own foosball table with the right materials, measurements, rod layout, and mistakes to avoid.
First, Choose the Right DIY Foosball Table Build
Before buying wood, cutting cardboard, or drilling holes, choose the build that matches your patience level.
A foosball homemade project can be fun, but the wrong version gets frustrating fast. Cardboard is great for kids. Wood is better for repeat play. A full-size football table is a serious woodworking project, not a lazy Saturday craft.
| Build Type | Best For | Time | Tools Needed | Durability | Best Keyword Intent |
| Cardboard foosball table | Kids, school projects, quick craft | 30 to 90 mins | Scissors, glue, ruler | Low | How to make a cardboard foosball table |
| Mini tabletop foosball | Small spaces, casual play | Half day | Drill, dowels, glue | Medium | diy mini foosball table |
| Wooden tabletop build | Most DIY users | Weekend | Drill, saw, clamps | High | How to build a foosball table out of wood |
| Full-size wooden table | Serious woodworking project | Several weekends | Full workshop tools | Very high | foosball table plans woodworking |
Best option for most readers: build a wooden tabletop foosball table.
It is more playable than cardboard, easier than a full cabinet, and still gives you that satisfying “I made this” feeling. It also works better for buyers who want a custom football table but do not want to commit to a huge build.
Materials and Tools You’ll Need
Your materials depend on the version you choose.
Do not mix a cardboard plan with full-size expectations. A shoebox build is supposed to be light and simple. A wooden box frame needs better alignment, stronger joints, and smoother rod movement.
For a Cardboard Foosball Table
A cardboard DIY foosball table is the easiest way to test the idea before building with wood.
Use a sturdy shoebox or shipping box if possible. Thin cardboard bends during play, especially when excited kids start treating the rods like arcade joysticks.
You will need:
- Cardboard box or shoebox
- Wooden dowels or bamboo skewers
- Clothespins or cardboard players
- Ping pong ball, pom-pom, or bottle cap ball
- Glue gun or strong craft glue
- Ruler
- Pencil
- Scissors or craft knife
- Colored paper or paint
- Tape
Clothespin players work well because they clip to rods easily. They are not tournament legal, but they have one big advantage: they do not complain when they miss an open goal.
For a Wooden DIY Foosball Table
A wooden DIY foosball table gives you better control, stronger walls, and a flatter playing field.
Plywood is a good choice for a beginner-friendly build. MDF can also work because it is flat and smooth, but it does not like moisture and needs sealed edges.
You will need:
- Plywood or MDF
- Wood screws
- Wood glue
- Wooden dowels or metal rods
- Handles or rubber grips
- Foosball players or homemade wooden players
- Drill
- Saw
- Clamps
- Sandpaper
- Paint
- Clear coat
- Measuring tape
- Square
For a simple tabletop build, wooden dowels can work. For a smoother football table feel, metal rods are better because they slide and rotate more consistently.
Optional Hardware for a Better Build
You can improve the table with real foosball hardware.
Just remember that rods, bearings, bumpers, handles, and player figures can raise the project cost quickly. Many first-time builders start with simple parts, then upgrade later once the table works.
Optional hardware includes:
- Real foosball rods
- Bearings
- Rubber bumpers
- Washers
- Commercial player figures
- Leg levelers
- Score beads
- Ball return parts
If your goal is a fun family table, keep it simple. If your goal is a smoother custom build, hardware upgrades make a real difference.
DIY Foosball Table Measurements and Layout
Measurements make or break this project.
A homemade foosball table does not need official tournament dimensions, but it does need clean spacing. Poor rod layout causes most DIY problems, including rod friction, loose players, tight movement, and players hitting the field.
Simple Tabletop Size for Beginners
These are practical beginner build ranges, not official rules.
Use them as a starting point for a mini or tabletop build. Adjust based on the ball size, rod thickness, and player size you choose.
| Part | Suggested Size |
| Playing surface | 36 to 42 inches long |
| Width | 18 to 24 inches |
| Side wall height | 4 to 5 inches |
| Rod height from the surface | Around 3 inches |
| Goal opening | 5 to 8 inches wide |
| Rod count | 4 rods for mini, 8 rods for full layout |
A smaller tabletop build is easier to control. It also takes less material and fits better on a dining table, workbench, or game room shelf.
Full-Size Reference Measurements
For a more serious build, look at full-size tables as a reference.
Many commercial tables use a playing surface around 48 inches long and 27 inches wide. Some Tornado-style layouts place rods a little over 3 inches above the playing surface, with player spacing around 6 inches on center.
Use these numbers as reference dimensions, not mandatory DIY rules.
Your homemade football table can be smaller and still play well. What matters most is that the rods are straight, the field is level, and the players clear the surface.
Rod Layout: The Part Most DIY Builds Get Wrong
The rod layout deserves more attention than paint color.
A beautiful table with misaligned holes will play badly. A plain table with accurate drilling can still be fun for years.
Follow these rules:
- Mark every rod hole before drilling.
- Use the same reference edge for every measurement.
- Clamp both side panels together when possible.
- Opposite holes must be level.
- Players need enough clearance from the surface.
- Players should not hit each other when spinning.
- Test one rod before drilling every hole.
- Use holes slightly larger than the rod diameter.
Smooth rod rotation comes from proper hole alignment. Decoration comes later.
As one workshop rule goes, “Measure twice, drill once, then brag quietly.”
How to Build a Wooden DIY Foosball Table
This is the main build for readers who want a stronger table.
A wooden tabletop version gives you the best balance of effort, durability, and play quality. It is also easier to store than a full-size football table and more satisfying than a flimsy cardboard frame.
Step 1: Draw the Build Plan Before Cutting
Start with a simple build plan.
You do not need a professional foosball table blueprint. You do need a clear sketch that shows the playing surface, side panels, goal openings, and rod positions.
Decide these items first:
- Tabletop or full-size build
- 4-rod or 8-rod setup
- Playing surface size
- Side wall height
- Goal opening width
- Rod positions
- Player layout
- Materials list
- Cutting list
A good foosball table plan saves wood, time, and frustration. It also helps you notice problems before your saw finds them.
For a first build, sketch a simple top view and side view. Mark the rod layout, goal layout, and field layout clearly.
Step 2: Cut the Playing Surface and Side Panels
Cut the playing surface first.
Then cut two long sidewalls and two end walls. Dry-fit the wooden box frame before gluing anything. This helps you check whether the frame is square.
Focus on:
- Straight cuts
- Flush edges
- Equal sidewall heights
- Square frame corners
- Clean measurements
Use clamps while checking the fit. If the frame is twisted at this stage, rods may bind later.
Plywood works well here because it is strong and easy to fasten. MDF creates a smooth surface but needs careful sealing.
Step 3: Cut the Goal Openings
Mark equal goal openings on both end walls.
Keep the openings centered and low enough for the ball to enter naturally. Do not cut them too tall or too close to the top edge, or the end wall may weaken.
Good goal openings should:
- Match on both ends
- Suit your chosen ball size
- Leave enough wood around the cutout
- Have smooth corners
- Allow easy ball retrieval
Sand the edges after cutting. Rough edges can stop the ball or scrape fingers.
A small jigsaw works well. A hole saw can also help if you want rounded corners.
Step 4: Drill the Rod Holes
This is the step that separates a playable design from a garage decoration.
Clamp both side panels together if you can. Mark all rod positions from the same edge, then pre-drill pilot holes before using the final bit size.
Key drilling tips:
- Mark all holes before drilling.
- Pre-drill holes to reduce tear-out.
- Drill slowly and keep the bit straight.
- Make holes slightly larger than the rod.
- Test rod movement before assembly.
- Sand rough hole edges.
If the holes are too tight, you get rod friction. If they are uneven, rods scrape. If they are too low, players hit the field.
This step is not glamorous, but it is where the game is won.
Step 5: Assemble the Frame
Now glue and screw the panels together.
Use clamps to hold the frame while the glue sets. Check the corners with a square before tightening everything down. Reinforce the inside corners if the table feels weak.
Focus on:
- Strong joints
- Reinforced corners
- Stable base
- Balanced frame
- Flush edges
Let the glue cure before installing rods. Rushing this step can twist the frame and create alignment issues.
A sturdy construction matters because players pull, push, spin, and occasionally celebrate like they just won the World Cup.
Step 6: Paint the Playing Field
Sand the playing surface before painting.
A smooth field makes the ball roll better. Thick paint, bumps, or raised brush marks can make the ball get stuck.
You can paint the field green, use a smooth laminate surface, or keep the wood sealed and simple.
Add:
- Center line
- Goal boxes
- Optional side markings
- Thin clear coat
- Smooth sealed finish
Do not overbuild the field lines. A DIY foosball table needs a level playing surface more than fancy graphics.
Let the paint and finish dry fully before play. Sticky paint and rolling balls do not get along.
Step 7: Install Rods, Handles, and Players
Insert the rods before permanently fixing handles.
Then space the players evenly and test their clearance. Players should swing freely without hitting the field or crashing into players on the opposite team.
Check for:
- Even player spacing
- Straight player alignment
- Smooth rod movement
- Proper washer or spacer placement
- Secure handles
- No rubbing against sidewalls
Homemade players can be made from shaped plywood, pegs, or 3D-printed parts. Commercial figures are easier, but homemade players give the table more personality.
Just avoid making players too heavy. Heavy figures can make wooden dowel rods bend.
Step 8: Add Legs or Keep It Tabletop
A tabletop build is easier.
You can place it on a table, bench, or floor. Add rubber feet underneath to stop sliding and protect furniture.
If you add legs, use cross-bracing. Thin legs without support can wobble during play.
For a better base:
- Add rubber feet for tabletop use.
- Use cross-bracing for legs.
- Check that the table sits level.
- Use leg levelers for a full-size build.
- Avoid tall, narrow legs on heavy cabinets.
A wobbly football table ruins the game fast. Nobody wants the ball rolling into the goal because the floor has opinions.
Step 9: Add Scorekeeping and Ball Return
Keep the first ball return simple.
A manual ball return is easier than a side return. You can cut small access openings behind the goals or add a sloped channel inside the end wall.
Simple options include:
- Plastic bead scorekeeper
- Wooden bead score rail
- Manual score strip
- End ball return
- Basic side ball return for advanced builds
Do not make the ball return too complicated on your first project. Poor ball return design often causes the ball to get stuck.
Finish by testing the table with real play. Slide each rod, spin lightly, pass the ball, shoot into both goals, and look for rubbing or dead spots.
How to Make a Cardboard Foosball Table
A cardboard build is perfect for kids, classrooms, rainy weekends, and quick craft projects.
It will not feel like a real table, but that is not the point. The point is to make foosball at home using simple recycled materials and a few clever shortcuts.
Best Cardboard Build Setup
Use a shoebox or sturdy cardboard box.
A shallow box is easier for kids to reach into. A deeper box gives rods more support but can make player clearance harder.
Best setup:
- Shoebox or sturdy cardboard box
- 4 rods instead of 8
- Clothespin players
- Ping pong ball or pom-pom
- Simple goal cutouts
- Paper field insert
- Tape or rubber band grips
A cardboard frame needs reinforcement. Add extra cardboard strips to the corners if the box bends.
Cardboard Build Steps
Start by cutting goal openings on both ends.
Then cover or paint the inside base. Mark four rod lines across the box, making sure the holes match on both sides.
Steps:
- Cut goal openings on both ends.
- Cover or paint the inside base.
- Mark 4 rod lines across the box.
- Punch or cut matching holes on both sides.
- Insert dowels or bamboo skewers.
- Clip or glue players to rods.
- Add handles with tape, rubber bands, or bottle caps.
- Test the ball movement.
The real challenge is spacing. Players need enough clearance to hit the ball, but not so much that they swing uselessly above it.
If the ball gets stuck between rows, widen the spacing. If players scrape the base, raise the rod holes slightly.
Free Foosball Table Plans and Blueprint Tips
Searchers often want foosball table plans, free foosball table plans, or a foosball table plans PDF.
You can download the foosball blueprint from here: https://www.slideshare.net/slideshow/foosball-tablediy/250290264
That makes sense. A good plan can prevent mistakes. A weak plan can cause them. Before you trust any foosball table blueprint, check whether it shows the details that actually affect play.
What a Good Foosball Table Plan Should Include
A useful plan should do more than show a rectangle.
Look for specific measurements and assembly details. The more complete the plan, the less guessing you do later.
A good foosball table plan should include:
- Finished table dimensions
- Playing surface size
- Sidewall height
- Rod hole positions
- Goal opening size
- Cutting list
- Materials list
- Player spacing
- Assembly diagram
- Hardware list
- Finishing notes
A build diagram is especially helpful for rod layout. Without it, many beginners drill holes too low, too close, or unevenly.
Before You Download Any Foosball Table Plans PDF
Check the plan before cutting materials.
Some free foosball table plans look nice but leave out important build measurements. That is risky if you are using real rods, bearings, or commercial players.
Ask these questions:
- Does it match your rod size?
- Does it show rod hole height?
- Does it include player spacing?
- Does it include goal size?
- Does it show ball return or not?
- Does it explain the 1-goalie vs 3-goalie layout?
- Does it include a cutting list?
- Does it show sidewall thickness?
Advanced plans may include CAD files, removable playing fields, side ball returns, bearing choices, leg levelers, and detailed hardware selection. Those features are helpful, but they are not required for a beginner build.
Common DIY Foosball Table Mistakes
Most homemade foosball table problems come from layout, not materials.
A cardboard table can play fine if the rods line up. A wooden table can play badly if the holes are crooked. Before blaming the ball, check the build.
| Mistake | What Happens | Fix |
| Rod holes are not aligned | Rods stick or scrape | Clamp both side panels and drill matching holes |
| Players are too low | Players hit the field | Test clearance before fixing players |
| Players are too close | Rods collide during rotation | Check spinning clearance before final assembly |
| Weak cardboard frame | The box bends during play | Reinforce corners with extra cardboard |
| Rough playing surface | The ball gets stuck | Sand, paint thinly, and seal |
| Goals too small | The game feels frustrating | Test with your chosen ball before final cutting |
| No stable base | The table moves during play | Add rubber feet, weight, or cross-bracing |
| Handles slip | Poor control | Use rubber grips, tape wraps, or glued handles |
| Poor ball return | The ball disappears inside the table | Keep the return short, open, and easy to inspect |
Users often report the same issue after a first DIY build: the rods do not move smoothly.
That usually means misaligned holes, rough edges, or holes drilled too close to the playing surface. Fix those first before replacing parts.
Is It Cheaper to Build or Buy a Foosball Table?
Sometimes DIY saves money. Sometimes it does not.
A cardboard build is clearly the cheapest. A mini tabletop build can also be a smart budget project. A full-size wooden football table may not be cheaper if you buy real rods, bearings, handles, players, and finishing materials.
DIY makes sense when you want:
- A custom size
- A family project
- A woodworking challenge
- A portable build
- A recycled materials project
- A table that fits a tight space
Buying makes more sense when you want:
- Tournament-level play right away
- Professional rod action
- Heavy cabinet stability
- Commercial-quality players
- No build time or adjustment work
A good way to decide is simple. If you mainly want the game, buy. If you want the project and the game, build.
Foosball Junkie readers often compare tables before buying, so a DIY build can also teach you what matters in a quality table: smooth rods, a stable cabinet, level playfield, and durable parts.
Final Build Checklist Before Playing
Before the first match, inspect the table like a builder, not an excited striker.
Small fixes now prevent annoying problems later. Nobody wants to stop a game every two minutes because the ball is stuck behind a crooked player.
Check that:
- The table sits level.
- Rods spin smoothly.
- Rods slide without scraping.
- Players clear the surface.
- Players are evenly spaced.
- Goals are centered.
- The ball does not get stuck.
- Handles are secure.
- Corners are smooth.
- Paint or finish is dry.
- The frame does not flex during play.
- The base feels stable.
Do one slow test game before normal play. Listen for scraping, watch the ball path, and adjust anything that feels rough.
A DIY foosball table does not need to be perfect. It needs to be solid, safe, smooth, and fun.
FAQs
Can I make a foosball table at home?
Yes. The easiest version uses a shoebox, dowels, clothespins, and a small ball. A stronger version uses plywood or MDF, rods, handles, and homemade or commercial players.
What is the easiest DIY foosball table?
A cardboard or shoebox foosball table is the easiest. For better gameplay, a wooden tabletop version is the best beginner upgrade.
How do you build a foosball table out of wood?
Build a box frame, cut goal openings, drill aligned rod holes, paint the playing field, install rods and players, then test rod movement and ball clearance.
Can I make a foosball table without special tools?
Yes, for cardboard or mini builds. For a wooden foosball table, you usually need at least a drill, saw, clamps, measuring tape, and sandpaper.
Are free foosball table plans enough?
Only if they include dimensions, rod hole placement, goal size, cutting list, player spacing, and hardware notes. A vague plan can cause misaligned rods and poor gameplay.
What can I use for homemade foosball players?
You can use clothespins, wooden pegs, shaped plywood pieces, 3D-printed players, or replacement foosball figures. Keep the players light, straight, and evenly spaced.
How many rods should a homemade foosball table have?
A mini or beginner table can use 4 rods. A more complete layout uses 8 rods. The 4-rod setup is easier for cardboard and compact tabletop builds.
What is the best material for a homemade foosball table?
Plywood is a strong beginner choice. MDF is smooth but needs sealed edges. Cardboard works for crafts and school projects, but it will not last like wood.
Can I build a full-size foosball table?
Yes, but it is a bigger project. A full-size football table needs stronger materials, accurate plans, stable legs, smoother rods, and better hardware.
Final Takeaway
A DIY foosball table is not just a cheaper version of a store-bought table. It is a chance to build the exact size, style, and difficulty level you want.
Start simple if this is your first build. Choose cardboard for kids, a mini tabletop design for small spaces, or a wooden box frame for better gameplay.
The secret is not fancy paint or complicated ball returns. It is clean measurements, aligned rod holes, steady player spacing, and smooth rod movement.
Get those right, and your homemade foosball table will do what every good table should do: start arguments, create rematches, and make people say, “One more game.”